Microsoft Visio has long been the standard for drawing flow-charts and other diagrams, however things have changed rapidly and now the open-source application Dia is mature enough to be an alternative.

Dia can be used for a variety of tasks; flowcharts, UML-diagram, network diagrams and electrical circuits. There are also several shape repositories available online to extend the program further.
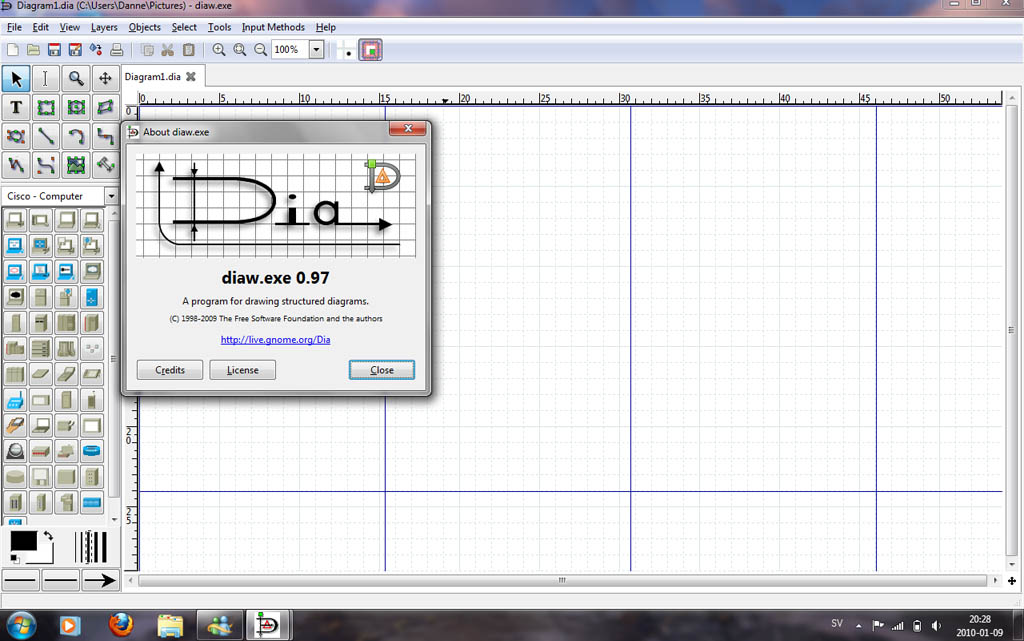
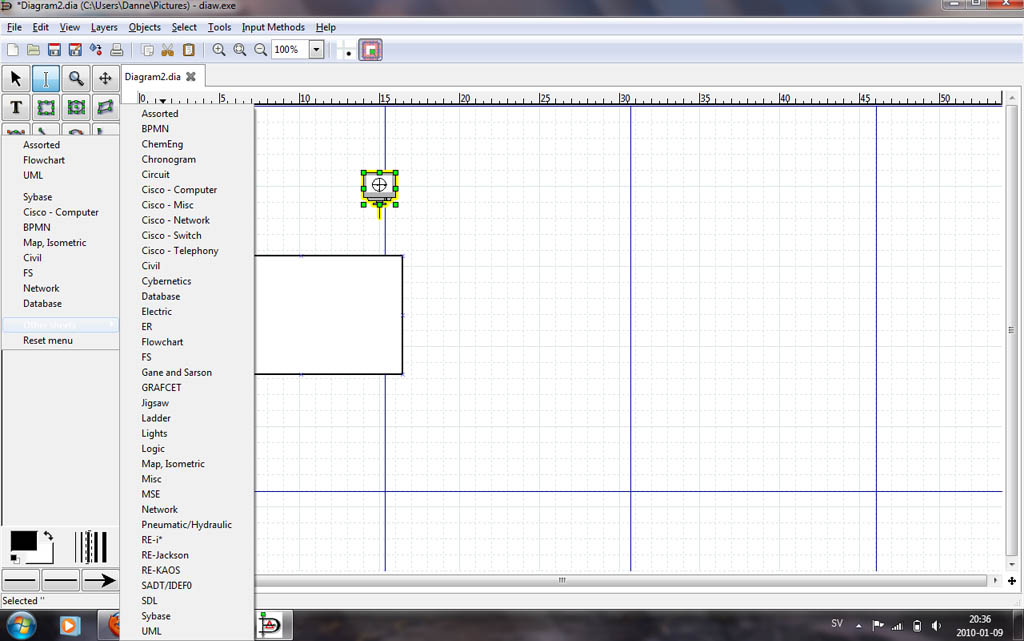
The user-interface in Dia is similar to Microsoft Visio, which has a solid user interface by default. It is easy to understand and work with. Sometimes it is even more intuitive than more powerful and commercial applications. The toolbox is easy to understand for most users and the way Dia handles shapes is intuitive.
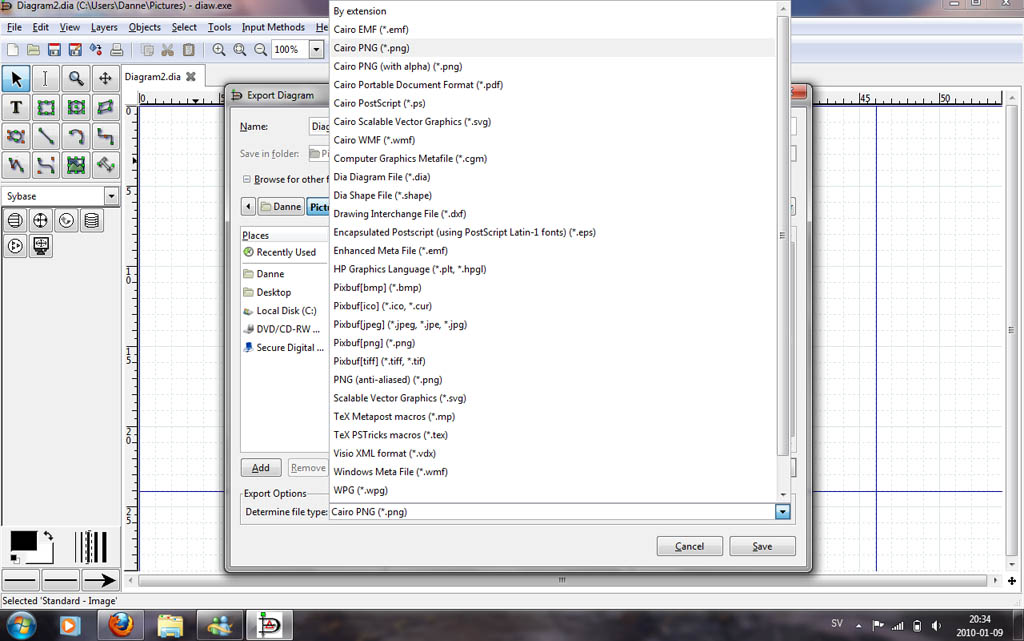
Flow-charts are often not drawn in a bubble, they usually have some other usage, for example in an application, or on the web. Dia has a number of export options, including .SVG, .PNG, .WMF etc. However the export options are not as well developed as in Microsoft Visio. For example it isn’t possible to create clickable flowcharts, which can be displayed in a web-browser. There is obviously a lack of Microsoft Sharepoint integration in Dia but also integration with open-source content management systems.
Dia also has a limitation when it comes to assigning characteristic and other information to shapes. Other applications have the ability to integrate data with the shapes, for example if a shape of a computer could contain processing power etc. This might not seem like a big draw-back but when drawing complex flows and networks it is actually a huge benefit being able to assign information to objects.
Overall Dia is a pretty good light-weight program for drawing flow-charts, network diagrams and what not. It is not as powerful and integrated as commercial alternatives such as Microsoft Visio, but it is still a viable alternative to get basic drawing done quickly. When on the road I was using my net book, it didn’t have Microsoft Visio installed so I downloaded Dia for the first time. In just a matter of minutes I was up and running drawing flow-charts, that is how powerful open-source software can be. Dia is available for Windows and Linux. With a little tweaking it can also be compiled on MAC OS X.
Microsoft Visio has long been the standard for drawing flow-charts and other diagrams, however things have changed rapidly and now the open-source application Dia is mature enough to be an alternative.
Dia can be used for a variety of tasks; flowcharts, UML-diagram, network diagrams and electrical circuits. There are also several shape repositories available online to extend the program further.
The user-interface in Dia is similar to Microsoft Visio, which has a solid user interface by default. It is easy to understand and work with. Sometimes it is even more intuitive than more powerful and commercial applications. The toolbox is easy to understand for most users and the way Dia handles shapes is intuitive.
Flow-charts are often not drawn in a bubble, they usually have some other usage, for example in an application, or on the web.Dia has a number of export options, including .SVG, .PNG, .WMF etc. However the export options are not as well developed as in Microsoft Visio. For example it isn’t possible to create clickable flowcharts, which can be displayed in a web-browser. There is obviously a lack of Microsoft Sharepoint integration in Dia but also integration with open-source content management systems.
Dia is limited when it comes to assigning characteristic and other information to shapes. Other applications have the ability to integrate data with the shapes, for example if a shape of a computer could contain processing power etc. This might not seem like a big draw-back but when drawing complex flows and networks it is actually a huge benefit being able to assign information to objects.
Overall Dia is a pretty good light-weight program for drawing flow-charts, network diagrams and what not. It is not as powerful and integrated as commercial alternatives such as Microsoft Visio, but it is still a viable alternative to get basic drawing done quickly. When on the road I was using my netbook, it didn’t have Microsoft Visio installed so I downloaded Dia for the first time. In just a matter of minutes I was up and running drawing flow-charts, that is how powerful open-source software can be. Dia is available for Windows and Linux. With a little tweaking it can also be compiled on MAC OS X.
 The average mobile user is not looking for a Photoshop-like experience when editing their beloved photos; instead most are trying to find apps were they quickly can edit photos of their latest night out or birthday party before posting them to Facebook or Twitter. This pose a problem, most basic photo-editing apps are cheesy, with loads of unwanted features, with only fair results. Thankfully times are changing.
Snapseed was originally developed by a company called Nik Software, primarily based in Germany. During 2012 Google bought the company and the Snapseed app, and we are already beginning to see the fruits of the acquisition, recently Snapseed for Android was released, and all versions of the app are now free.
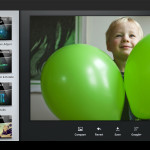
Using Snapseed is really a breeze, it is designed to be quick to operate and easy to share photos to different social networks. There is automatic contrast and color correction, but also various filters, such as vintage, drama, grunge and black and white. Each filter can be further adjusted in different ways to create effects. The gallery on Snapseeds' website features some remarkable results.
The sharing options in Snapseed include most standard social networks, such as Facebook, Twitter, Instagram and Google +. However since Google bought Snapseed Google+ has a more prominent shortcut than other social networks.
While the desktop version of Snapseed probably isn’t what most users are looking for, it includes the possibility to edit RAW-files.
So far Snapseed is very similar to the features in Instagram (which is in fact why Google probably bought the app in the first place) and loads of other apps available, but the ease of operating Snapseed, the fact that it’s free and the actual results outpaces much of the competition.
The average mobile user is not looking for a Photoshop-like experience when editing their beloved photos; instead most are trying to find apps were they quickly can edit photos of their latest night out or birthday party before posting them to Facebook or Twitter. This pose a problem, most basic photo-editing apps are cheesy, with loads of unwanted features, with only fair results. Thankfully times are changing.
Snapseed was originally developed by a company called Nik Software, primarily based in Germany. During 2012 Google bought the company and the Snapseed app, and we are already beginning to see the fruits of the acquisition, recently Snapseed for Android was released, and all versions of the app are now free.
Using Snapseed is really a breeze, it is designed to be quick to operate and easy to share photos to different social networks. There is automatic contrast and color correction, but also various filters, such as vintage, drama, grunge and black and white. Each filter can be further adjusted in different ways to create effects. The gallery on Snapseeds' website features some remarkable results.
The sharing options in Snapseed include most standard social networks, such as Facebook, Twitter, Instagram and Google +. However since Google bought Snapseed Google+ has a more prominent shortcut than other social networks.
While the desktop version of Snapseed probably isn’t what most users are looking for, it includes the possibility to edit RAW-files.
So far Snapseed is very similar to the features in Instagram (which is in fact why Google probably bought the app in the first place) and loads of other apps available, but the ease of operating Snapseed, the fact that it’s free and the actual results outpaces much of the competition.


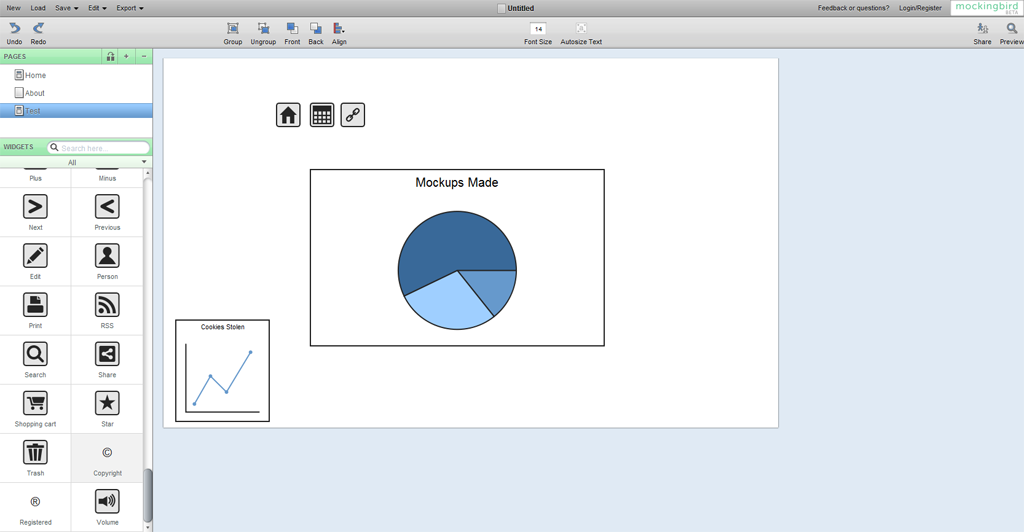
 The interface in Mockingbird is very straight-forward, the pane to he left includes a number of pre-defined shapes (such as drop-down lists, buttons, text etc). It is just a matter of dragging the symbols to the drawing-board and the aligning them. Alignment is easy and there are also options for grouping and sorting objects. Other features include undo/redo and the ability to export in PDF and PNG-format.
Another neat part of Mockingbird is the ability to add different pages and link between, so it is possible to create an entire web-experience completely within Mockingbird without much effort at all. Linking in Mockingbird is surprisingly easy; all it takes is just dragging the page to the link.
Everything in Mockingbird is fast and light-weight, the contrary to bloated products like Visio and Dia. Achieving a working proto-type of a website doesn’t take long at all, and sharing it with other developers on the same project is also very swift.
One limitation in Mockingbird is the lack of IE support, it only works with Firefox, Safari and Google Chrome. Of course it is not really a problem for web-developers as they often use various browsers, however in a corporate setting where Internet Explorer is more common Mockingbird can’t be used.
Although Mockingbird is very simple to work with it is often in creative meetings that you want that functionality, of course it requires that it is always possible to connect to the Internet. This is becoming a smaller problem by the day because of the penetration of mobile Internet. However there will be situations where Mockingbird can’t be used.
However Mockingbird is a great product, it is light-weight, easy to work with and responsive. It is still in beta; hopefully we will see versions for Internet Explorer and also apps for the Android and the Iphone where it would be very powerful.
The interface in Mockingbird is very straight-forward, the pane to he left includes a number of pre-defined shapes (such as drop-down lists, buttons, text etc). It is just a matter of dragging the symbols to the drawing-board and the aligning them. Alignment is easy and there are also options for grouping and sorting objects. Other features include undo/redo and the ability to export in PDF and PNG-format.
Another neat part of Mockingbird is the ability to add different pages and link between, so it is possible to create an entire web-experience completely within Mockingbird without much effort at all. Linking in Mockingbird is surprisingly easy; all it takes is just dragging the page to the link.
Everything in Mockingbird is fast and light-weight, the contrary to bloated products like Visio and Dia. Achieving a working proto-type of a website doesn’t take long at all, and sharing it with other developers on the same project is also very swift.
One limitation in Mockingbird is the lack of IE support, it only works with Firefox, Safari and Google Chrome. Of course it is not really a problem for web-developers as they often use various browsers, however in a corporate setting where Internet Explorer is more common Mockingbird can’t be used.
Although Mockingbird is very simple to work with it is often in creative meetings that you want that functionality, of course it requires that it is always possible to connect to the Internet. This is becoming a smaller problem by the day because of the penetration of mobile Internet. However there will be situations where Mockingbird can’t be used.
However Mockingbird is a great product, it is light-weight, easy to work with and responsive. It is still in beta; hopefully we will see versions for Internet Explorer and also apps for the Android and the Iphone where it would be very powerful.


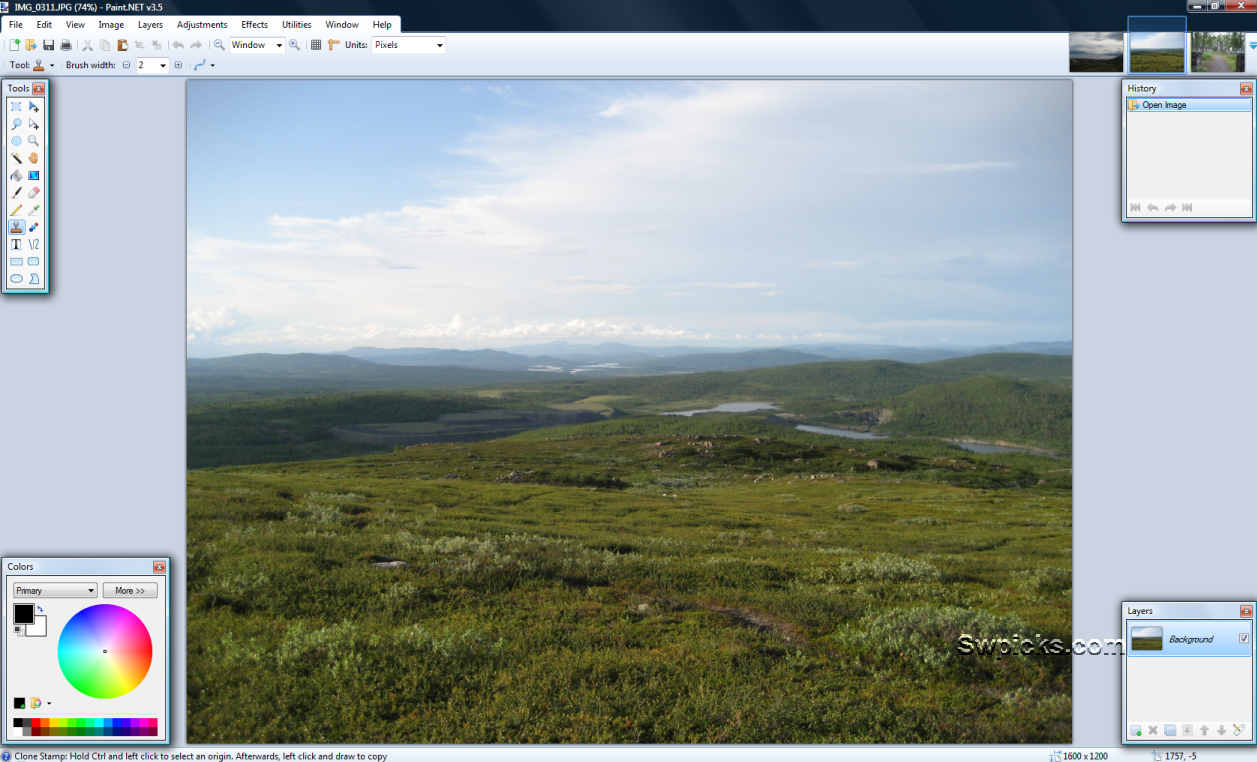
 Paint.net recently went through a serious face-lift and update with new and improved features. First of all Paint.net is surprisingly light-weight compared to Photoshop and even GIMP. The download file is only about 4 MB, the installation process is fast and Paint.net only takes about 9 MB on your hard-drive. Loading Paint.net is also extremely fast compared to both Photoshop and GIMP, if you are just making some small adjustments to a photo it is often done before Photoshop or GIMP even finished loading. Because of that it is a match made in heaven for netbooks with small drive capacity and low amounts of RAM.
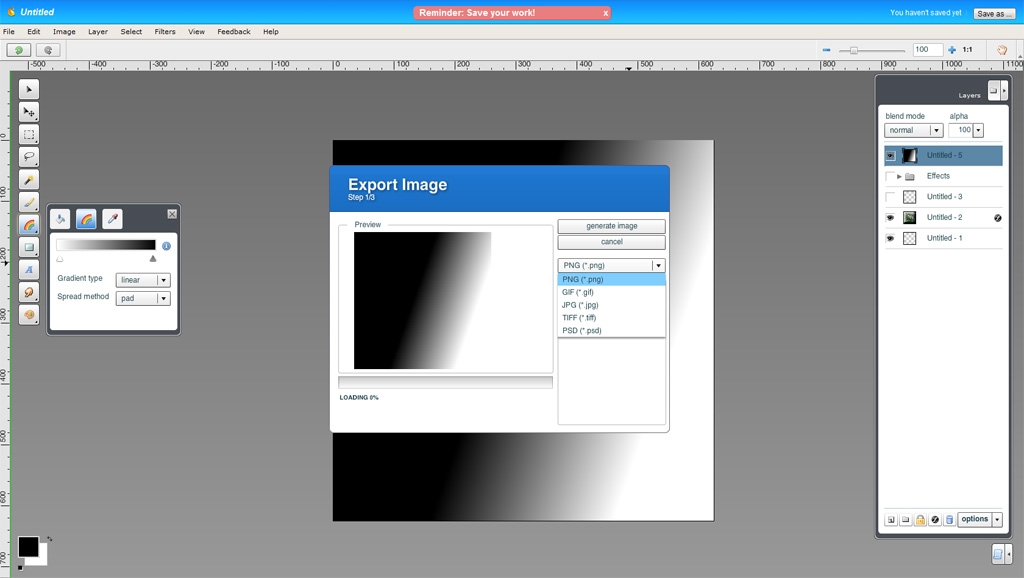
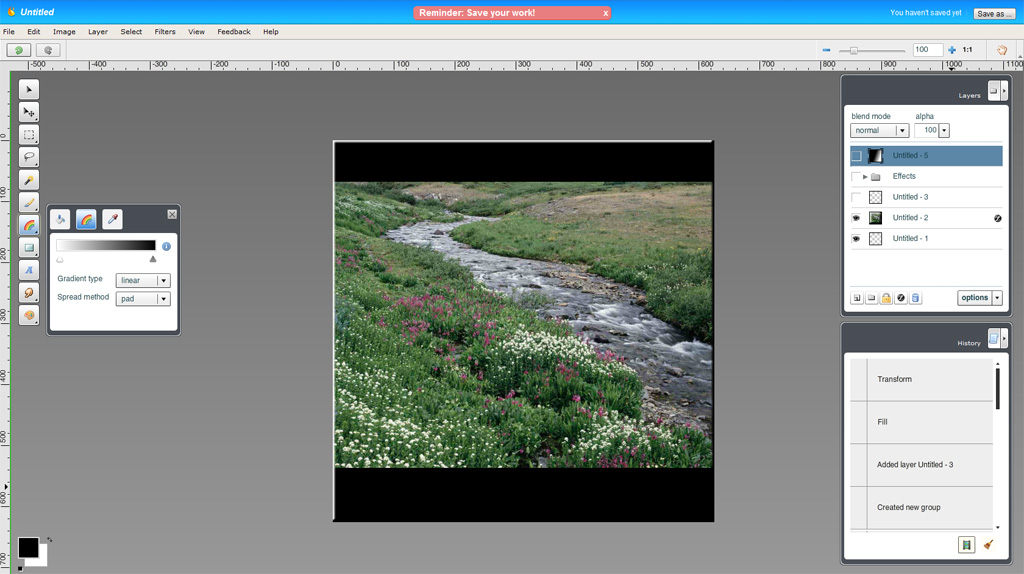
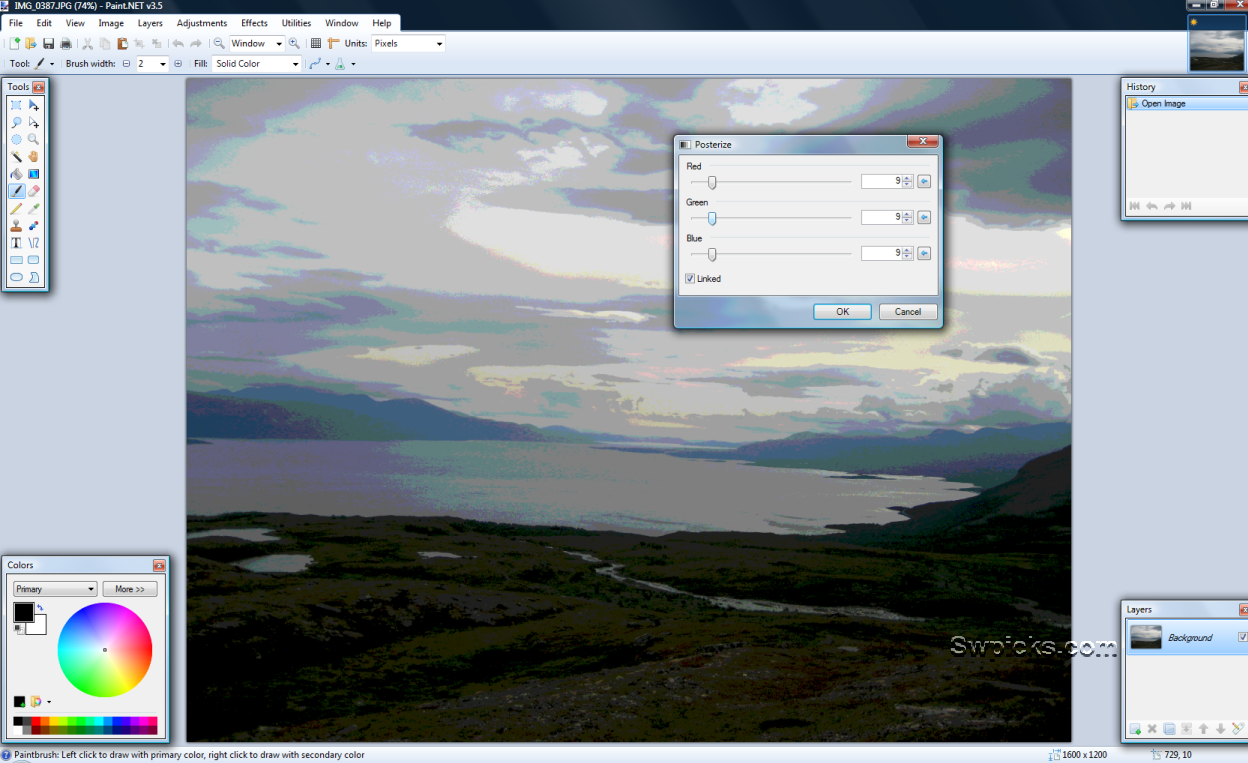
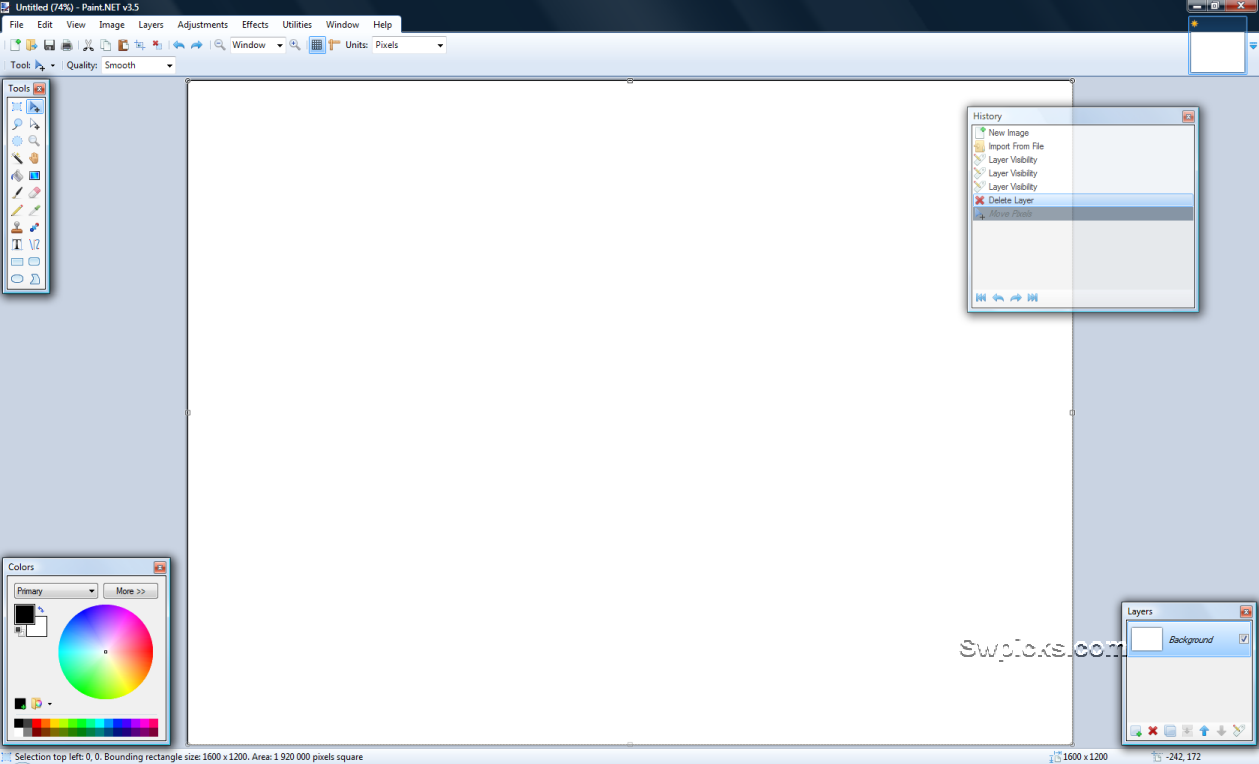
The interface in Paint.net is unbloated, yet by default very familiar for a Photoshop user. In the lower right corner is the layers panel, and on the right is the history window, the history is unlimited. A nice interface feature is the thumbnails in the upper right corner, displaying all open image files. It is easy to switch between open image files and quickly get an overview of what they contain.
Paint.net supports common image formats out there, but much fever than Photoshop or GIMP. For example it does not support .PSD or Paint Shop Pro -files so you are out of luck if you have a lot of files that you want to use originating from those programs.
While to boot process for Paint.net is fast it does not handle very large picture files fast. Loading a 1.5 megabyte image file takes a little longer than Photoshop, and applying different tools to the image also takes longer. Especially using the magic-wand and similar tools. Paint.net also isn't that good on handling print, for example it doesn't have a CMYK mode and the preview features for printing works good for family photos but not when doing professional prints. In that sense Paint.net is more useable for web-designers and web content creators. For example Paint.net has filters for red-eye removal and the basics such as blurring, sharpening, levels, hue and saturation. It does lack the more advanced filters found in other photo-editors.
Working with text in Paint.net is very easy but very limited. Of course it is possible to choose between different fonts and sizes, but that's about it. There is no features for adding extra effects, or aligning the text to paths.
Of course Paint.net as most other photo-editing tools worth the name uses layers, the best part is that they behave and work the same way as in Photoshop (which in my opinion has the best layers interface on the market). Other must-have tools included is the clone-stamp and the color picker.
Since the features in Paint.net is a bit limited at times there is a good amount of plug-ins available, for a novice user installing them is not that easy. Download a compressed file from the Paint.net forum, extract it to the right folder in Paint.net and the plug-in should be installed. The plug-in features should have been integrated with the software and could have been evolved much more.
Overall Paint.net is a great light-weight photo-editing application, it is easy and fast to use. Sure it is limited but as you add features software often become bloated, slow and difficult to use. The developers of Paint.net managed to keep it balanced. However the program might not fit everyone's needs, it doesn't support that many image-formats and its print capabilities are non-existent. Another downside of Paint.net is that there is no Linux or MAC version.
Paint.net recently went through a serious face-lift and update with new and improved features. First of all Paint.net is surprisingly light-weight compared to Photoshop and even GIMP. The download file is only about 4 MB, the installation process is fast and Paint.net only takes about 9 MB on your hard-drive. Loading Paint.net is also extremely fast compared to both Photoshop and GIMP, if you are just making some small adjustments to a photo it is often done before Photoshop or GIMP even finished loading. Because of that it is a match made in heaven for netbooks with small drive capacity and low amounts of RAM.
The interface in Paint.net is unbloated, yet by default very familiar for a Photoshop user. In the lower right corner is the layers panel, and on the right is the history window, the history is unlimited. A nice interface feature is the thumbnails in the upper right corner, displaying all open image files. It is easy to switch between open image files and quickly get an overview of what they contain.
Paint.net supports common image formats out there, but much fever than Photoshop or GIMP. For example it does not support .PSD or Paint Shop Pro -files so you are out of luck if you have a lot of files that you want to use originating from those programs.
While to boot process for Paint.net is fast it does not handle very large picture files fast. Loading a 1.5 megabyte image file takes a little longer than Photoshop, and applying different tools to the image also takes longer. Especially using the magic-wand and similar tools. Paint.net also isn't that good on handling print, for example it doesn't have a CMYK mode and the preview features for printing works good for family photos but not when doing professional prints. In that sense Paint.net is more useable for web-designers and web content creators. For example Paint.net has filters for red-eye removal and the basics such as blurring, sharpening, levels, hue and saturation. It does lack the more advanced filters found in other photo-editors.
Working with text in Paint.net is very easy but very limited. Of course it is possible to choose between different fonts and sizes, but that's about it. There is no features for adding extra effects, or aligning the text to paths.
Of course Paint.net as most other photo-editing tools worth the name uses layers, the best part is that they behave and work the same way as in Photoshop (which in my opinion has the best layers interface on the market). Other must-have tools included is the clone-stamp and the color picker.
Since the features in Paint.net is a bit limited at times there is a good amount of plug-ins available, for a novice user installing them is not that easy. Download a compressed file from the Paint.net forum, extract it to the right folder in Paint.net and the plug-in should be installed. The plug-in features should have been integrated with the software and could have been evolved much more.
Overall Paint.net is a great light-weight photo-editing application, it is easy and fast to use. Sure it is limited but as you add features software often become bloated, slow and difficult to use. The developers of Paint.net managed to keep it balanced. However the program might not fit everyone's needs, it doesn't support that many image-formats and its print capabilities are non-existent. Another downside of Paint.net is that there is no Linux or MAC version.


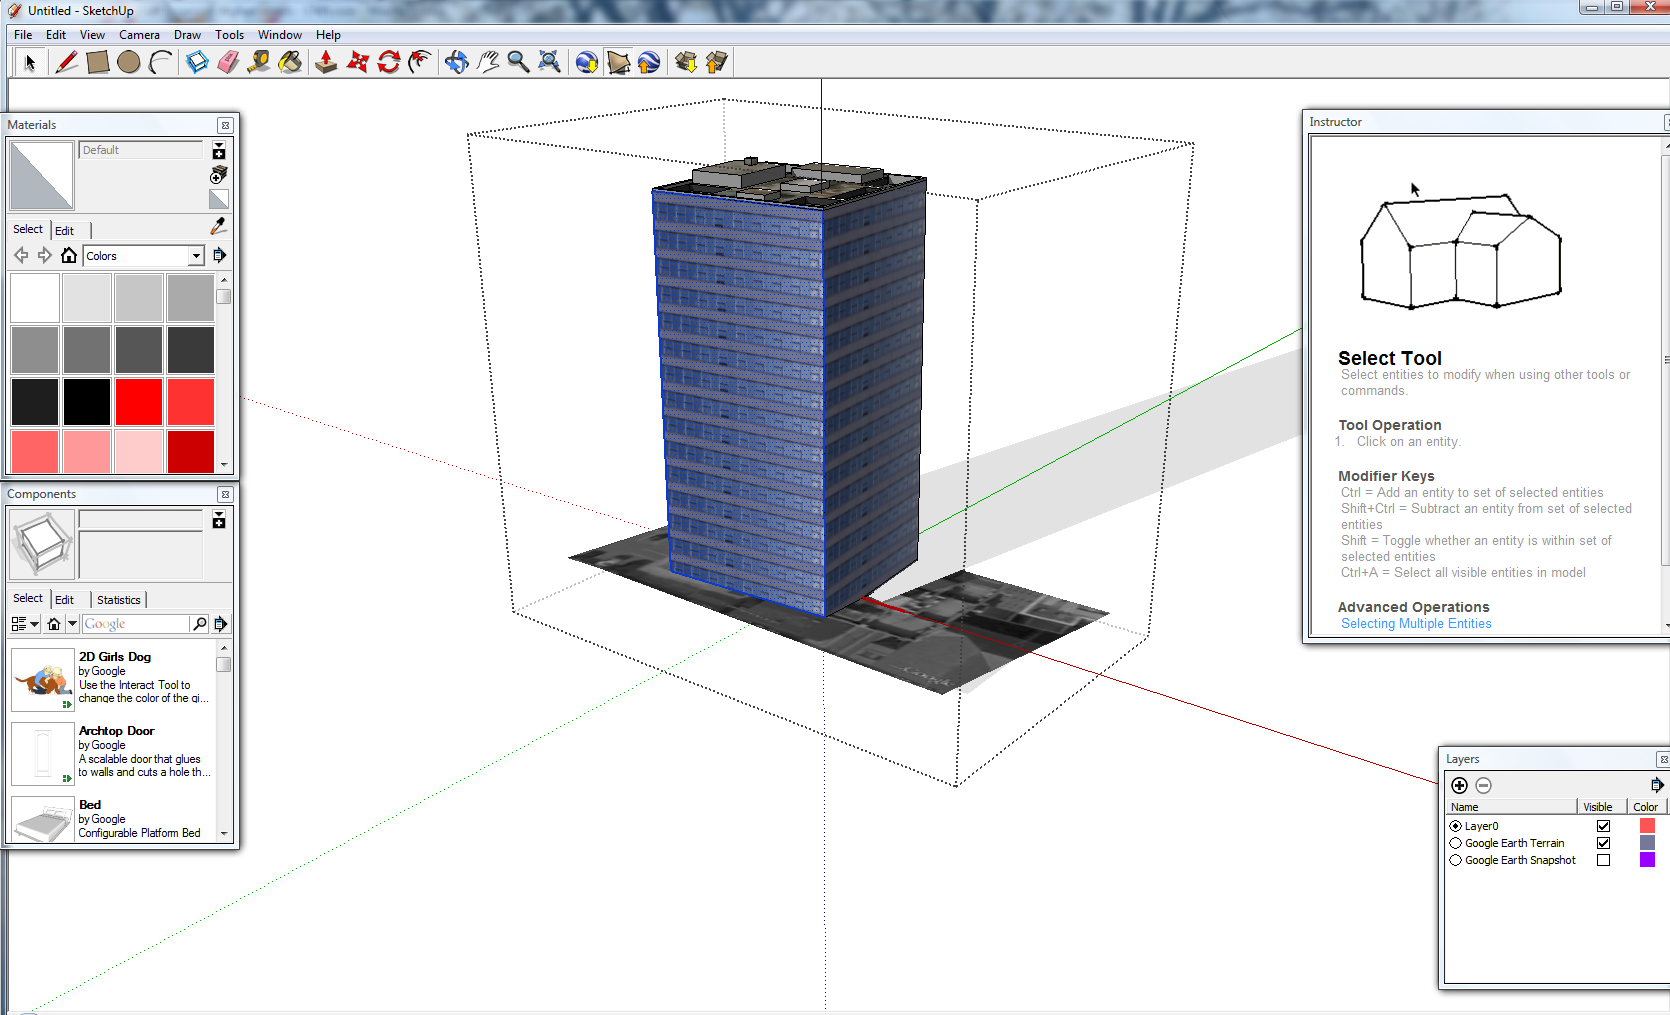
 SketchUp is a 3D modeling application, there are two versions one free (the one we will be testing) and a Pro version with more file-format options among other things. The pro version is $495. Both versions of SketchUp are integrated with Google Earth, allowing you to create 3D-models of buildings and then exporting them.
By nature 3D modeling apps are complicated; mastering suites like 3D Studio Max, Lightwave or Blender takes lots of time. SketchUp on the other hand is pretty easy to learn, and is one of few 3D applications where you can start experimenting almost right away.
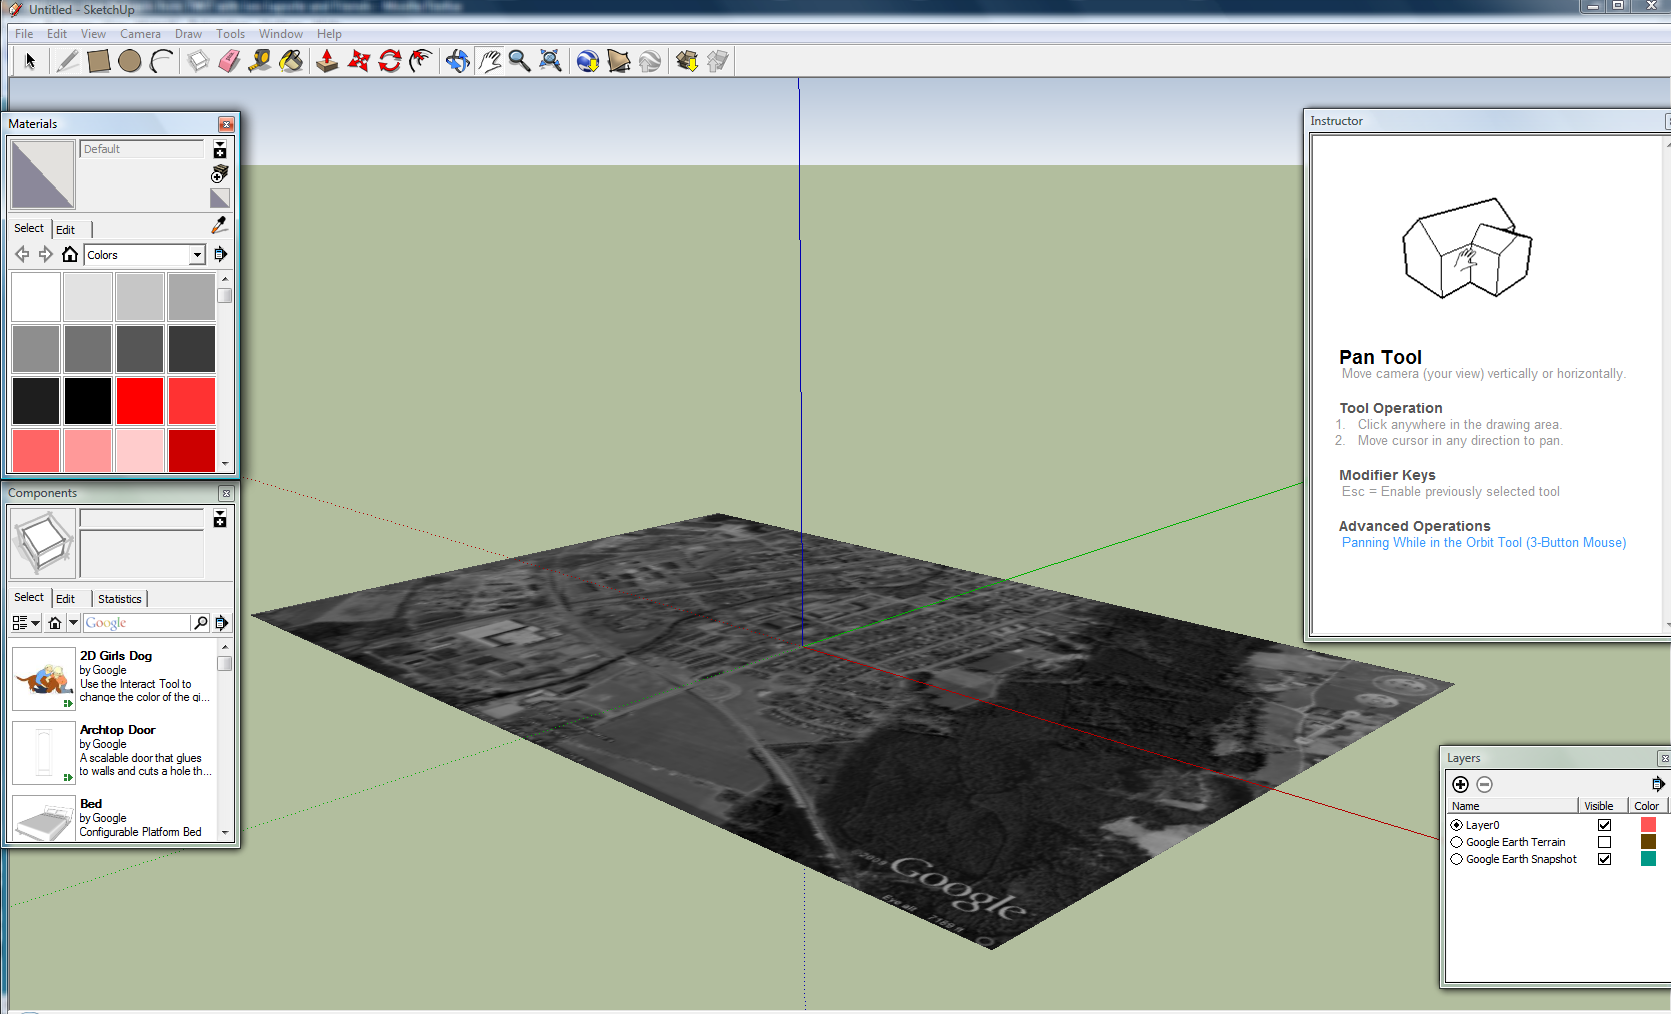
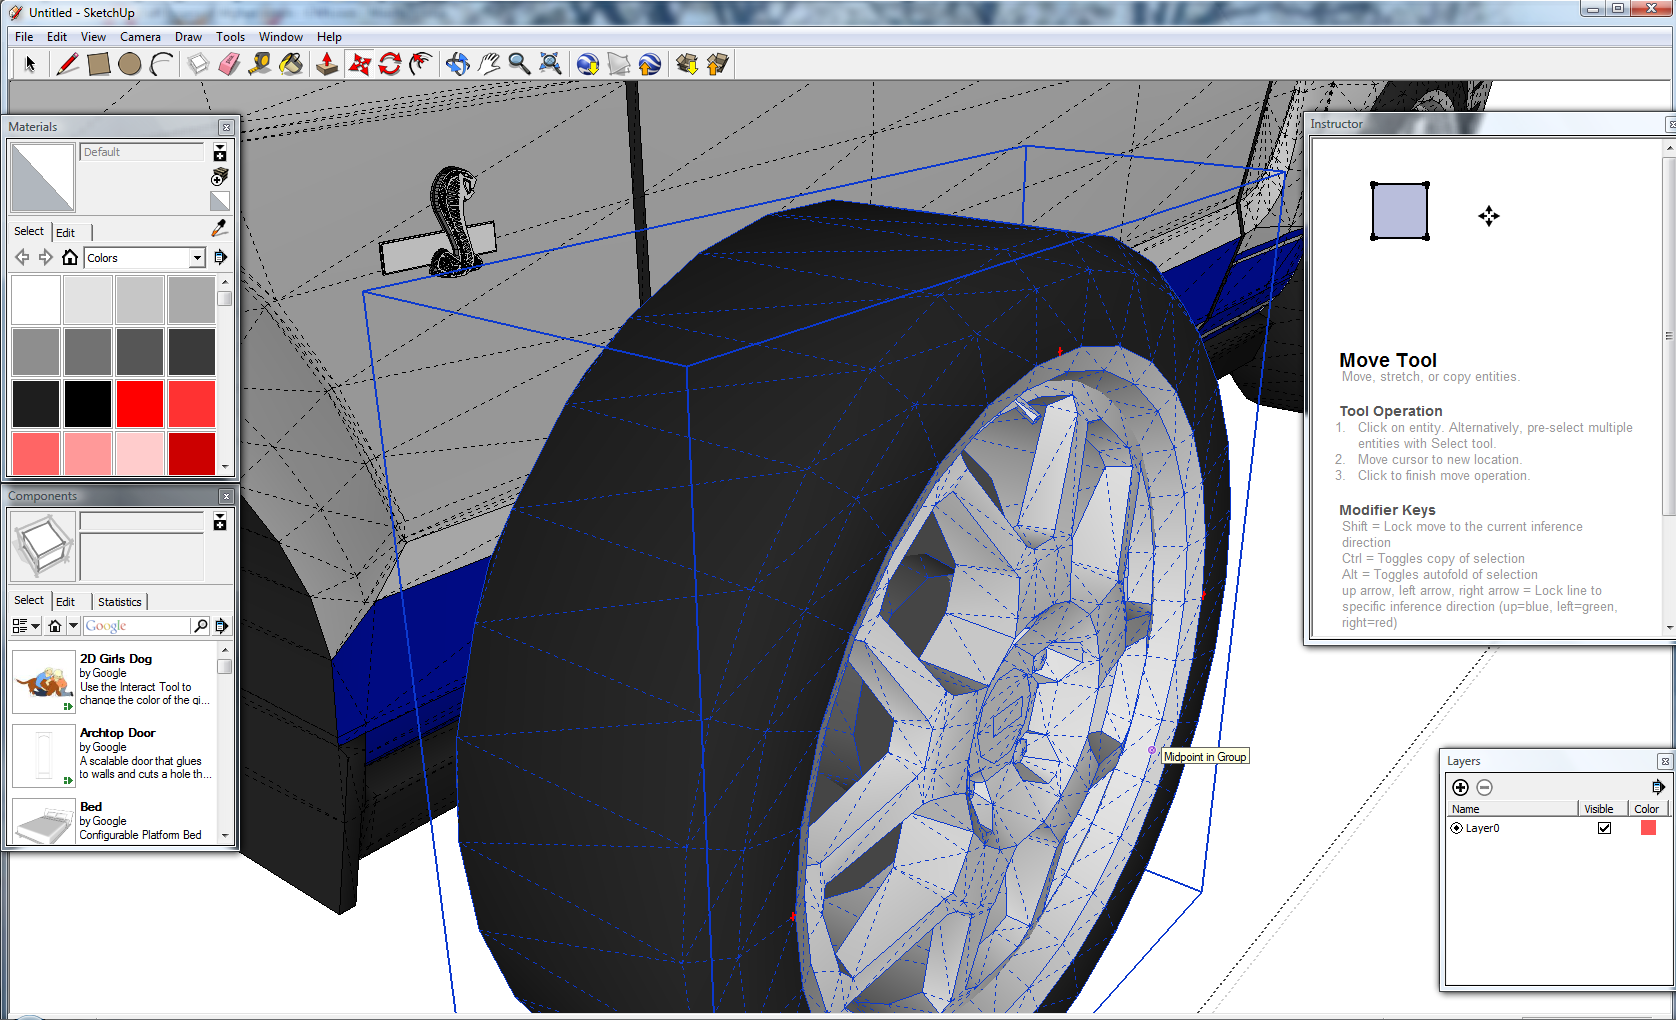
The interface is easy to grasp, to make it even easier Google added some neat help texts for each tool that shows up in the upper right corner. There are some basic shapes you start with, such as rectangles, circles and polygons. In SketchUp you first create a 2D surface and then make it 3D, so for example if you want to create a wheel you first create a couple of circle surfaces, make them 3D and then flip the thing however you want it.
Most of the common tools are located in the upper part of the screen. The more advanced functions are hidden inside the menus by default, so it takes a little bit of browsing to find the good stuff. It is possible customize the desktop to see the tools and features that you want.
SketchUp has the features built in to work with layers, sort of like Adobe Photoshop. Outliner is a similar tool but creates a tree of the different objects in the model, it makes it a lot easier navigating models with many different objects involved.
Another very neat feature is the components, if you have created an object that you will use in many 3D models, for example a door. You can save the door locally as a component, then when you want it in another model you just fetch it from components browser.
SketchUp comes with Google Earth integration; it was however a bit flaky as my test computer started to install updates to Google Earth when I clicked “Get current view” from Google SketchUp. The problem was that the installation files that Google Earth was looking for could not be found and the computer locked up in an endless installation process. Then after restarting SketchUp the import from Google Earth worked flawlessly.
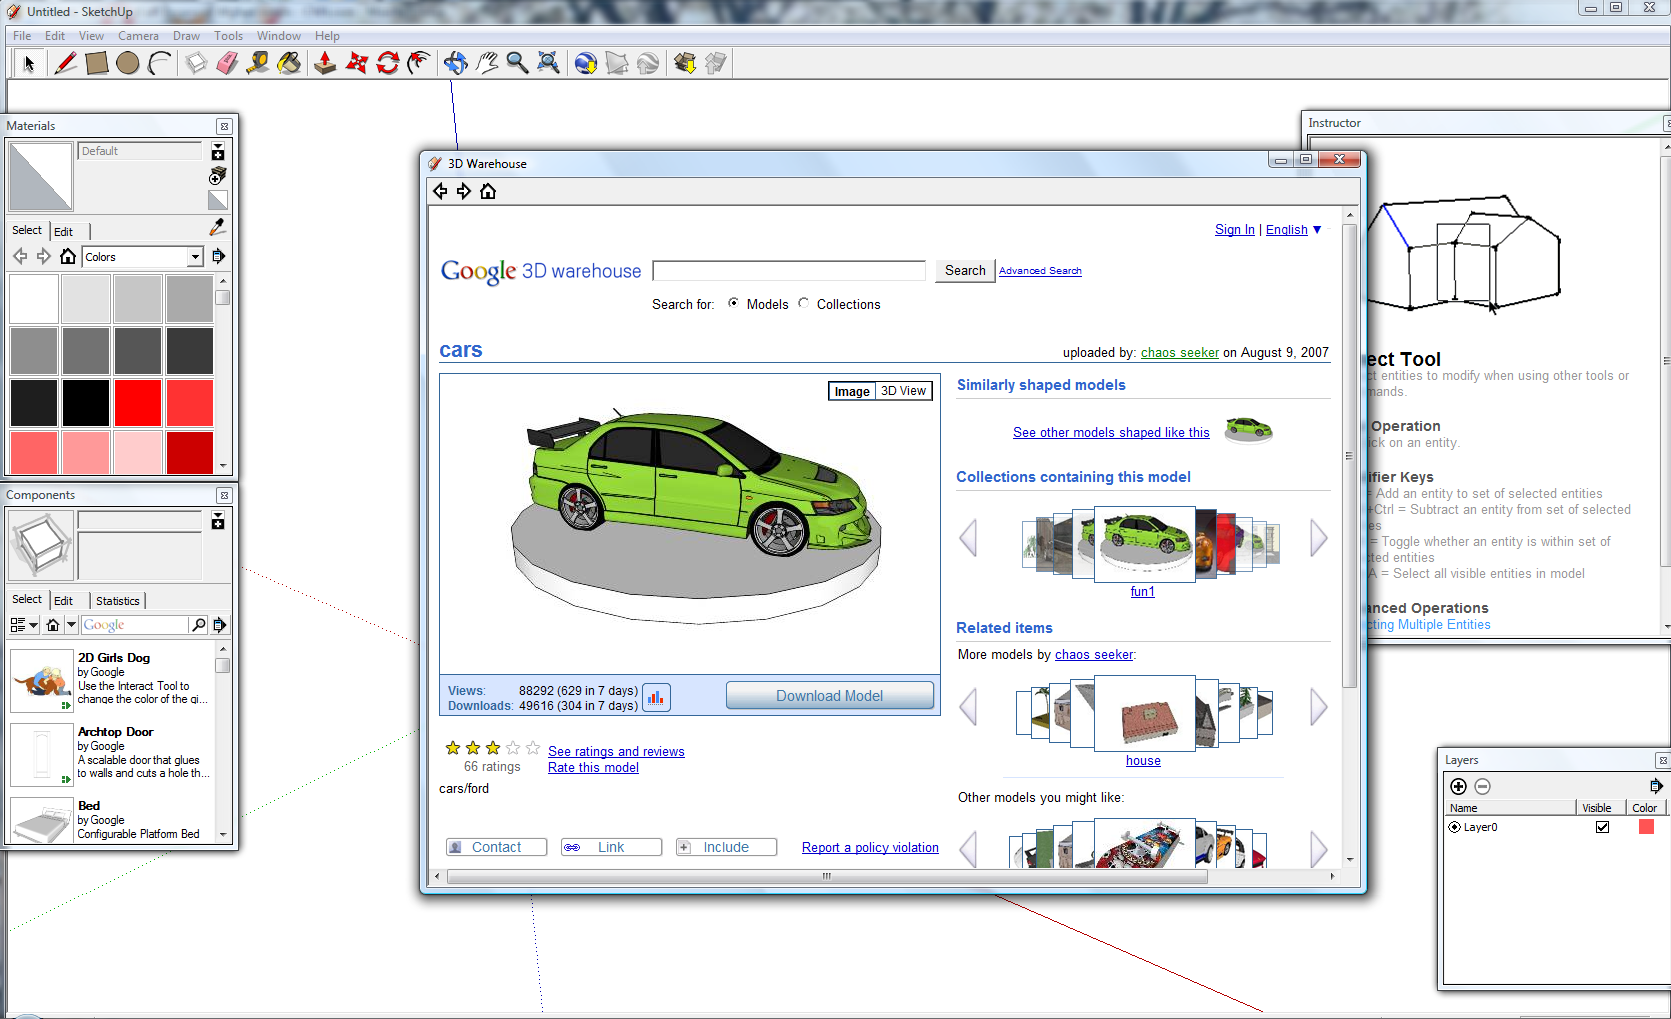
Even-though SketchUp are simple to use it does take time to master it fully. Opening the 3D warehouse makes you fully aware of that. The warehouse contains a number of user created models, many of them quite beautiful. They can easily be loaded directly into your scene; your model can also be uploaded to the warehouse. All of the models are rated by other users, and there are also comments attached to them, so in a sense SketchUp is one of a few 3D modeling apps with social web capabilities.
A drawback with SketchUp is that it does not render the 3D models itself, more expensive tools does this. In the pro version it is possible to export models in a number of different formats, the model can then be imported into a third party rendering engine. For example Blender.
[ad#Content Adsense]
SketchUp is a surprisingly fast program and nimble program. Large models run very well on an average computer, so there is no need for extra hardware such as memory when using this program. To fully master any 3D-application you often need to buy expensive books or online courses, sometimes even attend courses. SketchUp has a vibrant community and a load of free video tutorials. The tutorials ranges from the basics of learning the different tools in the program to making CAD-drawings and other advanced work.
Of course SketchUp is not a general tool that fits everyone, it can be used by game designers, engineers, architects or people interested in developing 3D-models for Google Earth. It is however relatively easy to get started with, making it broader in scope than many other similar applications.
Creating 3D models is perhaps not as hyped as the entire social and web 2.0 stuff that is going on right now. But SketchUp is a very good example what happens when you make something easy to use and add social capabilities in the background, it becomes great.
SketchUp is a 3D modeling application, there are two versions one free (the one we will be testing) and a Pro version with more file-format options among other things. The pro version is $495. Both versions of SketchUp are integrated with Google Earth, allowing you to create 3D-models of buildings and then exporting them.
By nature 3D modeling apps are complicated; mastering suites like 3D Studio Max, Lightwave or Blender takes lots of time. SketchUp on the other hand is pretty easy to learn, and is one of few 3D applications where you can start experimenting almost right away.
The interface is easy to grasp, to make it even easier Google added some neat help texts for each tool that shows up in the upper right corner. There are some basic shapes you start with, such as rectangles, circles and polygons. In SketchUp you first create a 2D surface and then make it 3D, so for example if you want to create a wheel you first create a couple of circle surfaces, make them 3D and then flip the thing however you want it.
Most of the common tools are located in the upper part of the screen. The more advanced functions are hidden inside the menus by default, so it takes a little bit of browsing to find the good stuff. It is possible customize the desktop to see the tools and features that you want.
SketchUp has the features built in to work with layers, sort of like Adobe Photoshop. Outliner is a similar tool but creates a tree of the different objects in the model, it makes it a lot easier navigating models with many different objects involved.
Another very neat feature is the components, if you have created an object that you will use in many 3D models, for example a door. You can save the door locally as a component, then when you want it in another model you just fetch it from components browser.
SketchUp comes with Google Earth integration; it was however a bit flaky as my test computer started to install updates to Google Earth when I clicked “Get current view” from Google SketchUp. The problem was that the installation files that Google Earth was looking for could not be found and the computer locked up in an endless installation process. Then after restarting SketchUp the import from Google Earth worked flawlessly.
Even-though SketchUp are simple to use it does take time to master it fully. Opening the 3D warehouse makes you fully aware of that. The warehouse contains a number of user created models, many of them quite beautiful. They can easily be loaded directly into your scene; your model can also be uploaded to the warehouse. All of the models are rated by other users, and there are also comments attached to them, so in a sense SketchUp is one of a few 3D modeling apps with social web capabilities.
A drawback with SketchUp is that it does not render the 3D models itself, more expensive tools does this. In the pro version it is possible to export models in a number of different formats, the model can then be imported into a third party rendering engine. For example Blender.
[ad#Content Adsense]
SketchUp is a surprisingly fast program and nimble program. Large models run very well on an average computer, so there is no need for extra hardware such as memory when using this program. To fully master any 3D-application you often need to buy expensive books or online courses, sometimes even attend courses. SketchUp has a vibrant community and a load of free video tutorials. The tutorials ranges from the basics of learning the different tools in the program to making CAD-drawings and other advanced work.
Of course SketchUp is not a general tool that fits everyone, it can be used by game designers, engineers, architects or people interested in developing 3D-models for Google Earth. It is however relatively easy to get started with, making it broader in scope than many other similar applications.
Creating 3D models is perhaps not as hyped as the entire social and web 2.0 stuff that is going on right now. But SketchUp is a very good example what happens when you make something easy to use and add social capabilities in the background, it becomes great.


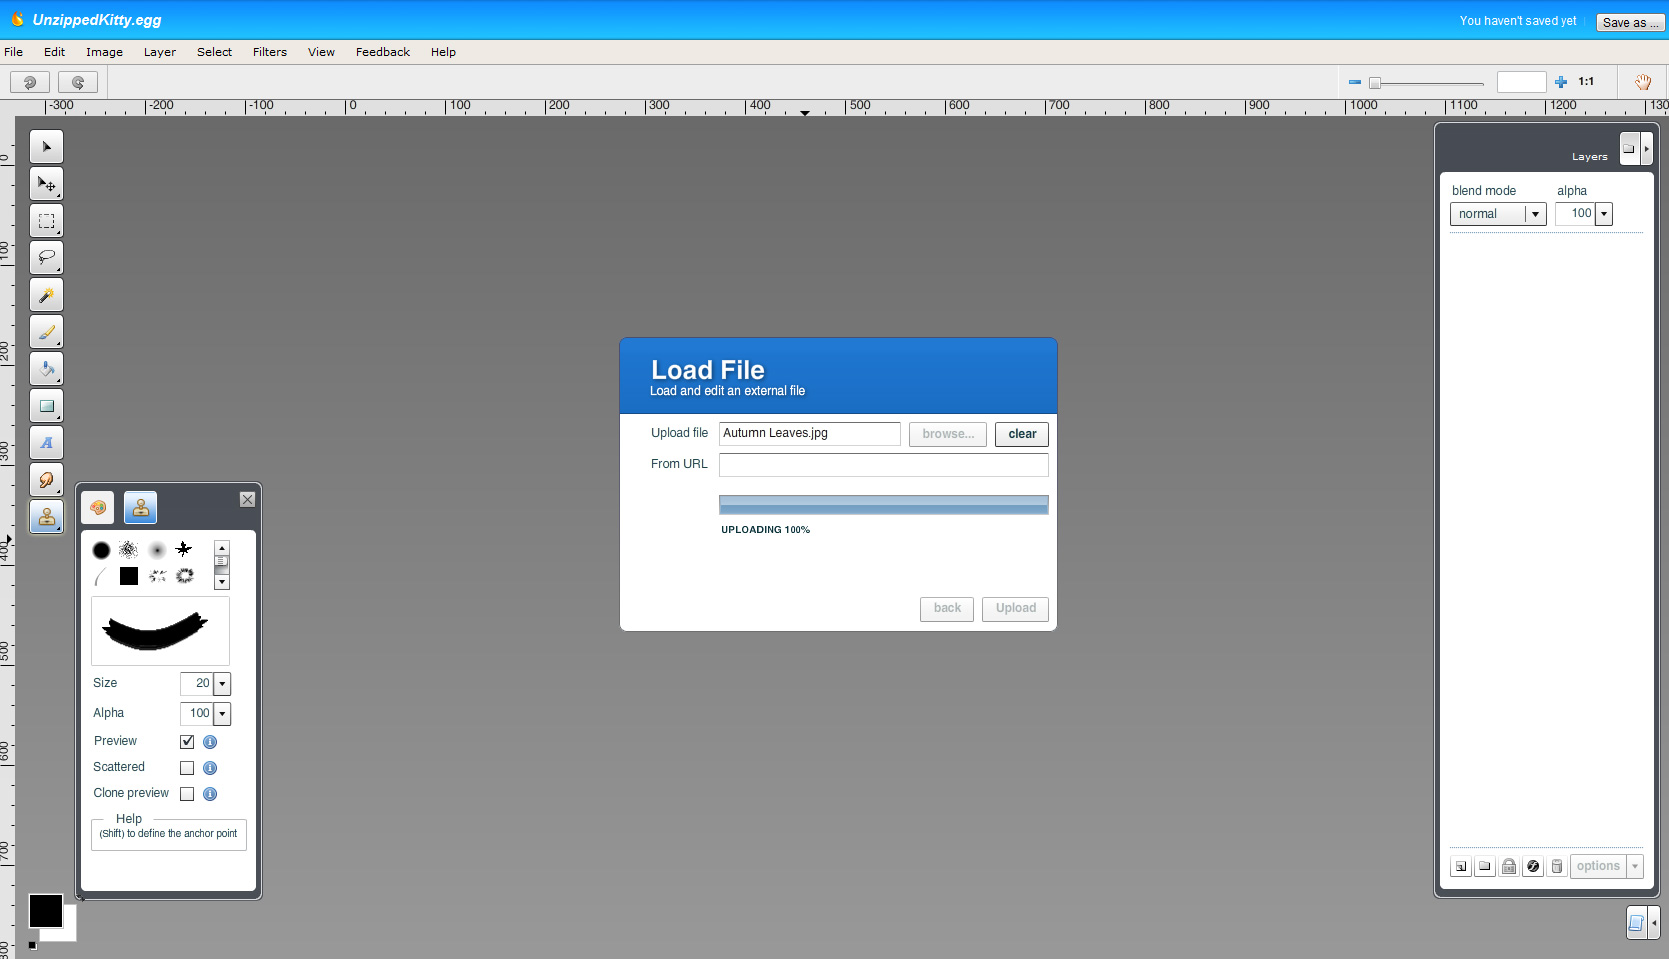
 While most cloud apps require you to sign-up in order to do anything Picnik gives you the opportunity to just use the basic service without any sign-up process. This is great when you just want to edit something quickly on the go and then posting it online.
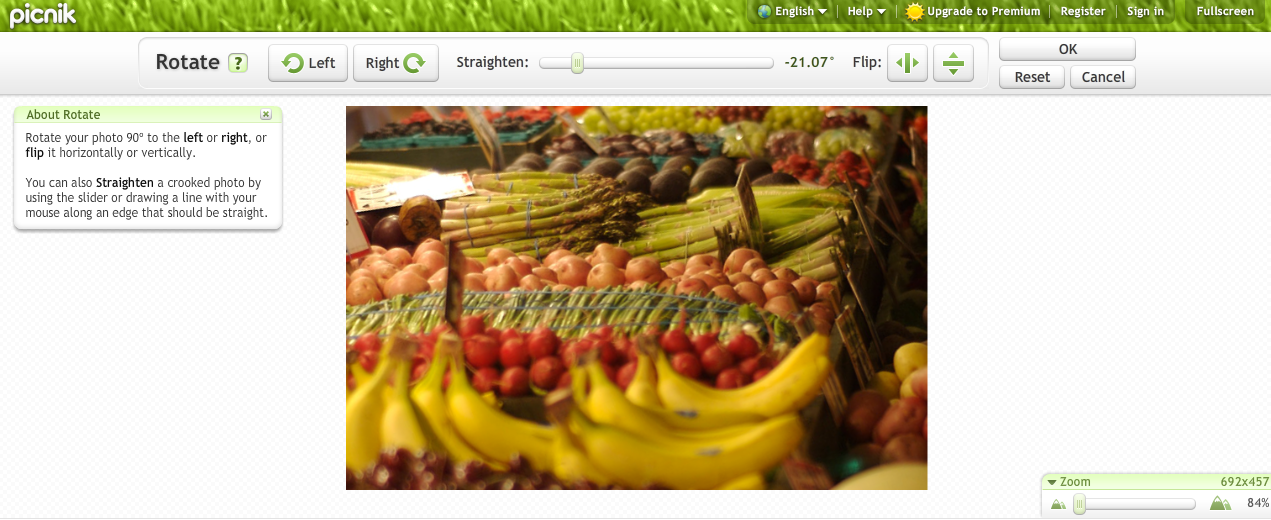
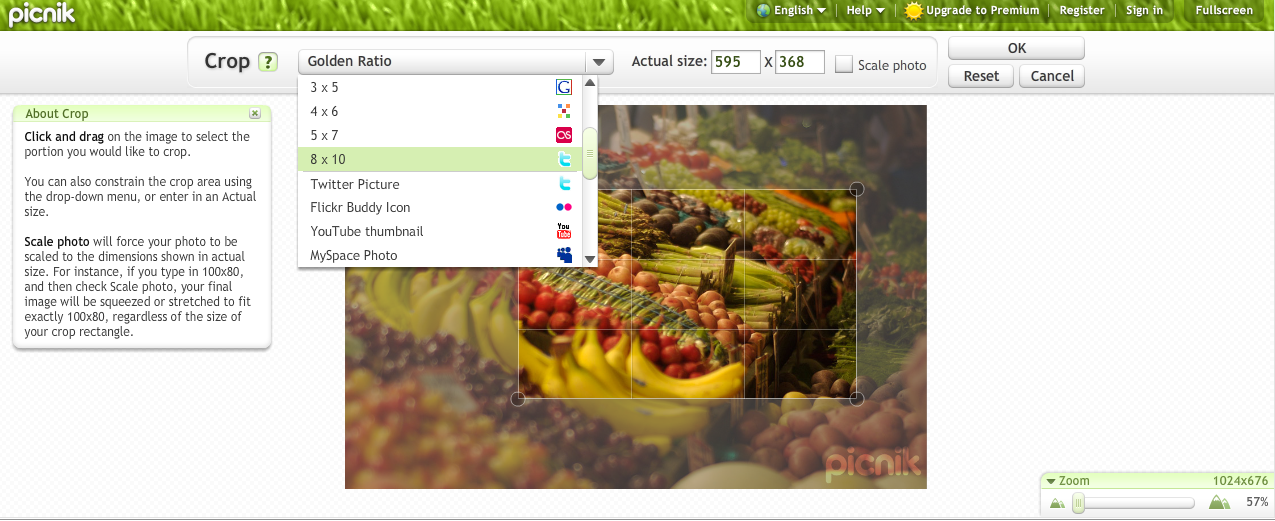
Picnik also have a number of other features. For example it is possible to crop, resize, sharpen or rotate photos. Picnik also have nice options for adjusting colors and exposure, it is also possible to correct red-eyes by just clicking a button.
Adjusting colors in Picnik is pretty easy, but of course with less options than in Photoshop or Gimp. It is possible to change the saturation and color temperature. You can also pick a neutral area in the image and use it as a base for adjustment.
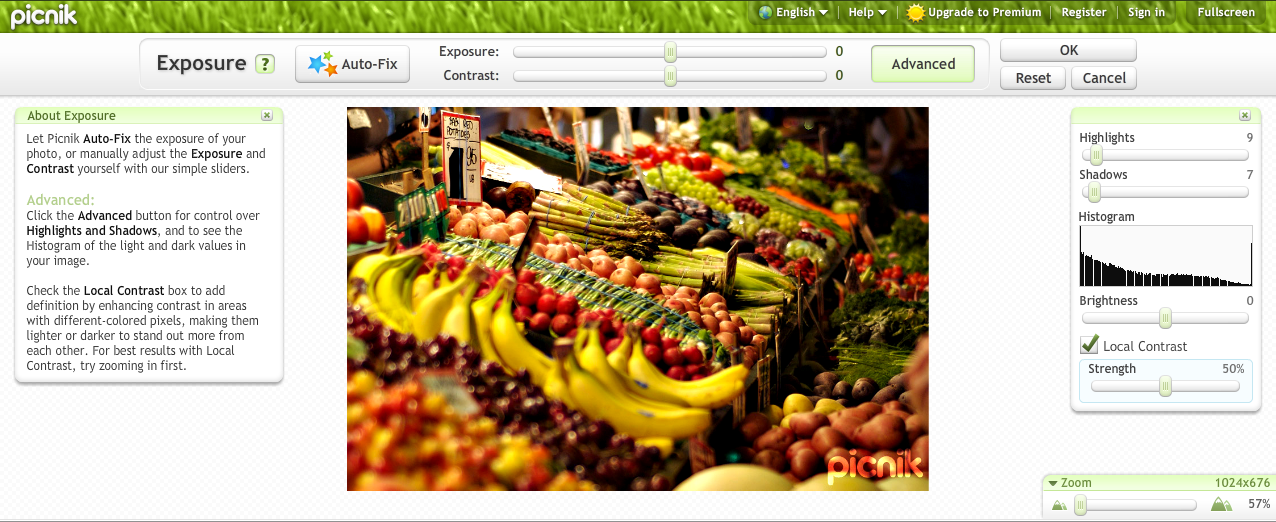
Adjusting the exposure is one of the most important features in photo-editing software. In Picnik it is possible to change the contrast and exposure. The more advanced options allow you to change brightness, the exposure of shadows and lighter areas. Picnik also have a histogram so that you can more easily adjust photos the way you want them.
The red-eye reduction works pretty well, there are different options for human and pet-eyes. If you do not want to go through all the editing options manually there is a auto-fix option, Picnik will then automatically adjust your photos applying all the options mentioned above.
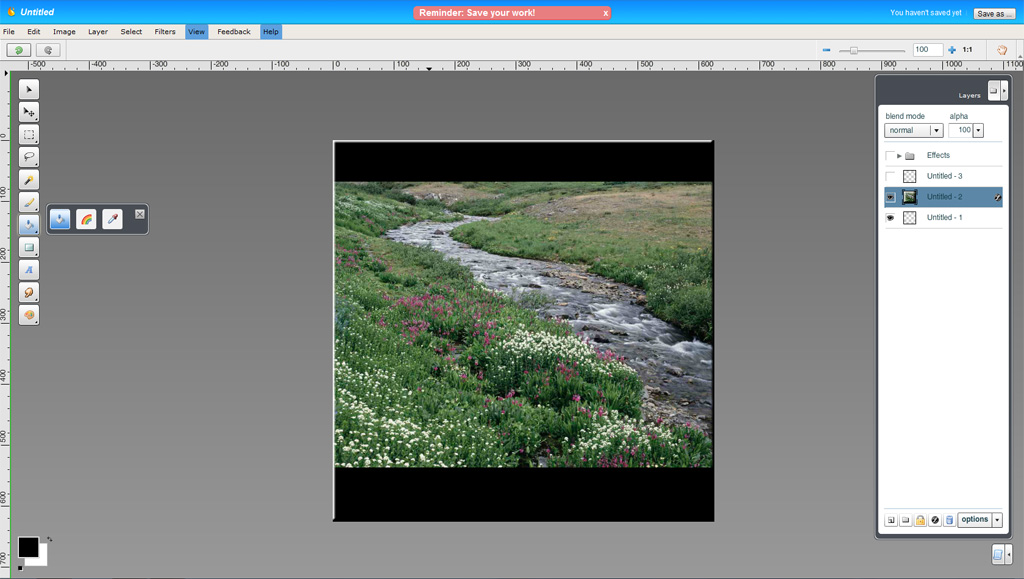
Most of us have played around in Photoshop and Gimp with the different effect filters. Picnik have a set of its own, by selecting the Create tab you get a surprisingly high number of different effects. You get the usual soften, greyscale and sepia effects. But also some really nice ones, such as snow, 1960s colors and a favorite from Photoshop, the pencil sketch. The effects really look great, and there is no difference really from desktop software. They are also easy to apply and manage if you have used similar features before.
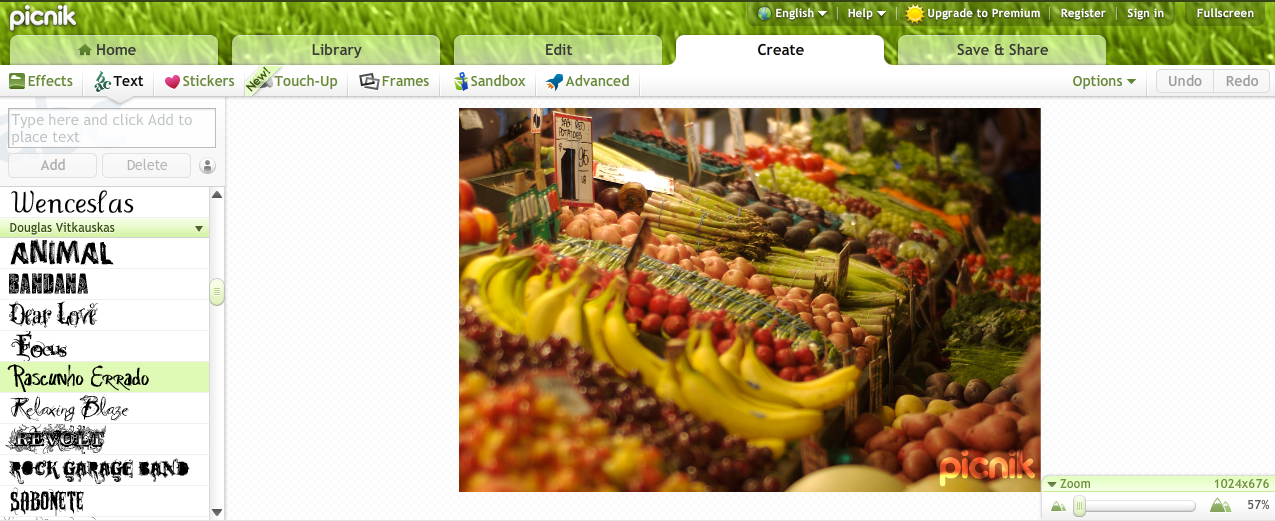
Picnik also includes features for working with text and applying it to images and photos. There are a number of different fonts available, since Picnik is in the cloud it is impossible to add your own fonts as would be possible in Photoshop or Gimp.
A new addition in Picnik is the touch-up feature. It a set of effects aimed at touching up photos of humans. For example there is a lipstick effect and a feature where you can change the weight of the person in the photo. Most of the other touch-up options are available in the premium version (for $2.08 a month).
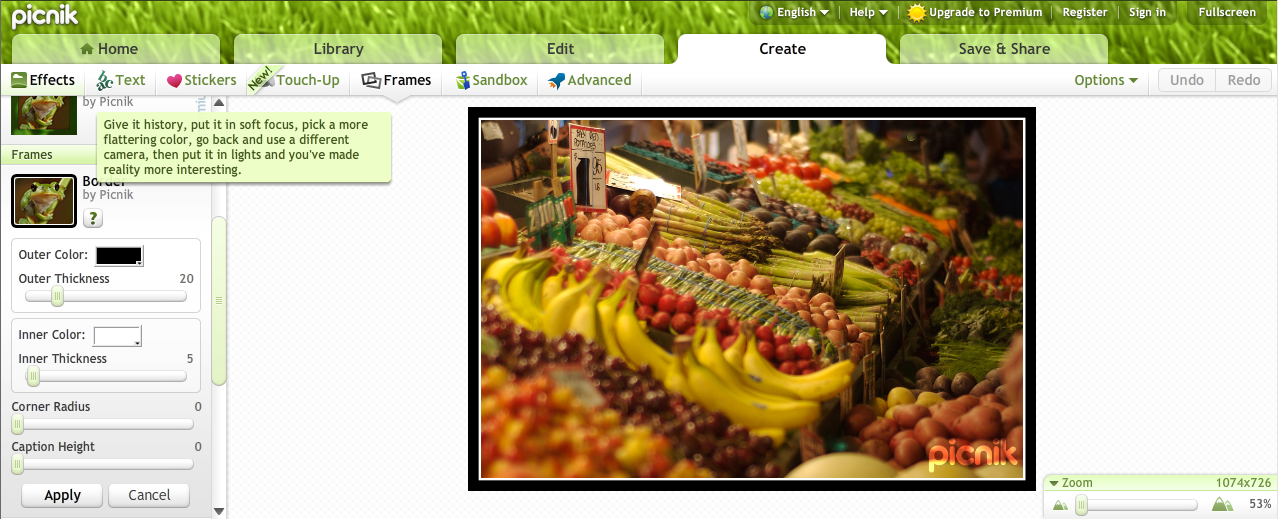
Picnik comes with different frames that you can apply around your photos, such as a stamp effect and rounded edges. There is also an interesting feature in Picnik; called Sandbox, where users have made their own effects using flash scripting. The scripting makes it possible to bend photos in different ways, not possible before (according to Picnik).
Overall Picnik is a great photo-editing tool, the free version goes a long way and the premium version is pretty cheap compared to Photoshop and other photo-editing software. For people who want basic photo-editing software with a few advanced features Picnik is perfect, I even dare to say that it beats Gimp in some areas such as ease of use. Picnik is also surprisingly fast, even though it runs in the cloud it starts faster than Photoshop and Gimp does on my machine. For Adobe Picnik is a very dangerous competitor for the online version of Adobe Photoshop.
[ad#Content Adsense]
While most cloud apps require you to sign-up in order to do anything Picnik gives you the opportunity to just use the basic service without any sign-up process. This is great when you just want to edit something quickly on the go and then posting it online.
Picnik also have a number of other features. For example it is possible to crop, resize, sharpen or rotate photos. Picnik also have nice options for adjusting colors and exposure, it is also possible to correct red-eyes by just clicking a button.
Adjusting colors in Picnik is pretty easy, but of course with less options than in Photoshop or Gimp. It is possible to change the saturation and color temperature. You can also pick a neutral area in the image and use it as a base for adjustment.
Adjusting the exposure is one of the most important features in photo-editing software. In Picnik it is possible to change the contrast and exposure. The more advanced options allow you to change brightness, the exposure of shadows and lighter areas. Picnik also have a histogram so that you can more easily adjust photos the way you want them.
The red-eye reduction works pretty well, there are different options for human and pet-eyes. If you do not want to go through all the editing options manually there is a auto-fix option, Picnik will then automatically adjust your photos applying all the options mentioned above.
Most of us have played around in Photoshop and Gimp with the different effect filters. Picnik have a set of its own, by selecting the Create tab you get a surprisingly high number of different effects. You get the usual soften, greyscale and sepia effects. But also some really nice ones, such as snow, 1960s colors and a favorite from Photoshop, the pencil sketch. The effects really look great, and there is no difference really from desktop software. They are also easy to apply and manage if you have used similar features before.
Picnik also includes features for working with text and applying it to images and photos. There are a number of different fonts available, since Picnik is in the cloud it is impossible to add your own fonts as would be possible in Photoshop or Gimp.
A new addition in Picnik is the touch-up feature. It a set of effects aimed at touching up photos of humans. For example there is a lipstick effect and a feature where you can change the weight of the person in the photo. Most of the other touch-up options are available in the premium version (for $2.08 a month).
Picnik comes with different frames that you can apply around your photos, such as a stamp effect and rounded edges. There is also an interesting feature in Picnik; called Sandbox, where users have made their own effects using flash scripting. The scripting makes it possible to bend photos in different ways, not possible before (according to Picnik).
Overall Picnik is a great photo-editing tool, the free version goes a long way and the premium version is pretty cheap compared to Photoshop and other photo-editing software. For people who want basic photo-editing software with a few advanced features Picnik is perfect, I even dare to say that it beats Gimp in some areas such as ease of use. Picnik is also surprisingly fast, even though it runs in the cloud it starts faster than Photoshop and Gimp does on my machine. For Adobe Picnik is a very dangerous competitor for the online version of Adobe Photoshop.
[ad#Content Adsense]